

A practical guide for dentists looking to integrate digital smile design and 3D printing into everyday clinical practice.
Introduction: Bringing Digital Smile Design into the Patient’s Mouth
Digital dentistry is changing the way clinicians approach aesthetic treatment planning. With advances in CAD software and 3D printing, it is now possible to transform a digitally designed smile into a physical mock-up that can be tried directly in the patient’s mouth.
A 3D-printed Smile Trial allows clinicians and patients to preview a proposed smile before proceeding with definitive restorative treatment. It creates an opportunity to evaluate tooth contours, proportions, and overall aesthetics while improving communication between the clinician and the patient.
Whether you are a general dentist exploring aesthetic dentistry for the first time or an experienced clinician looking to refine your digital workflow, understanding the principles of 3D-Printed Smile Design can open new possibilities for treatment planning.
In this article, we will explore the essential steps, from clinical photography and digital design to 3D printing and the Smile Trial, while comparing direct-printed mock-ups with the traditional putty-key technique.
1. Smile Design Basics: Starting with the Patient
Before designing a smile, it is important to understand the relationship between teeth, lips, and facial features. Smile design involves more than selecting tooth shapes or creating symmetrical restorations. It requires consideration of the patient’s facial characteristics, lip dynamics, incisal edge position, gingival display, and individual aesthetic goals.
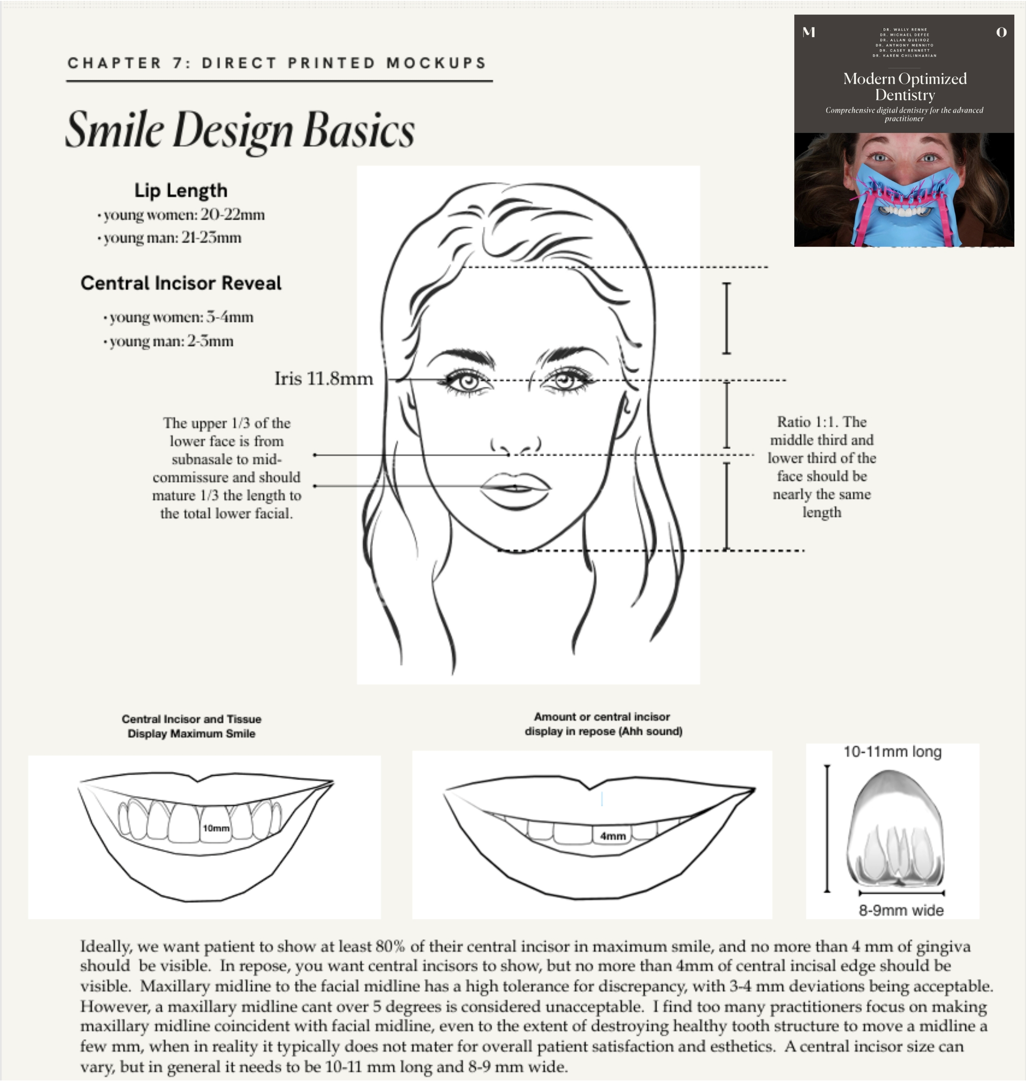
Fundamental principles of smile design, including facial proportions, lip characteristics, incisor display, and tooth dimensions.
These factors provide useful reference points when planning a proposed smile. However, aesthetic measurements should not be treated as rigid rules. Age, facial anatomy, tooth structure, occlusion, and patient preferences all influence the final design.
The objective is to develop a smile that is harmonious with the patient’s face, clinically appropriate, and consistent with their expectations.
2. Clinical Photography: The Foundation of Digital Smile Design
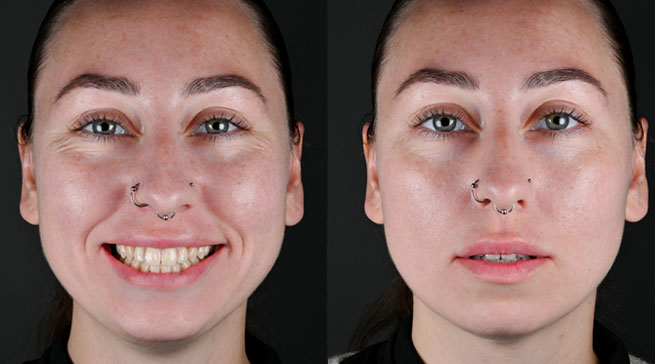
A successful digital smile design workflow starts with appropriate clinical photography. Photographs provide the visual information needed to assess the existing smile; plan proposed tooth proportions and communicate the intended outcome.
For a basic workflow, three key photographs can be used:
- Full-face smile photograph: Shows the relationship between the teeth, lips, and facial features.
- Retracted intraoral photograph: Provides a clear view of the teeth and surrounding gingival tissues.
- Unretracted smile photograph: Captures the patient’s smile without retractors, helping the technician assess the proposed design in a more natural facial context.
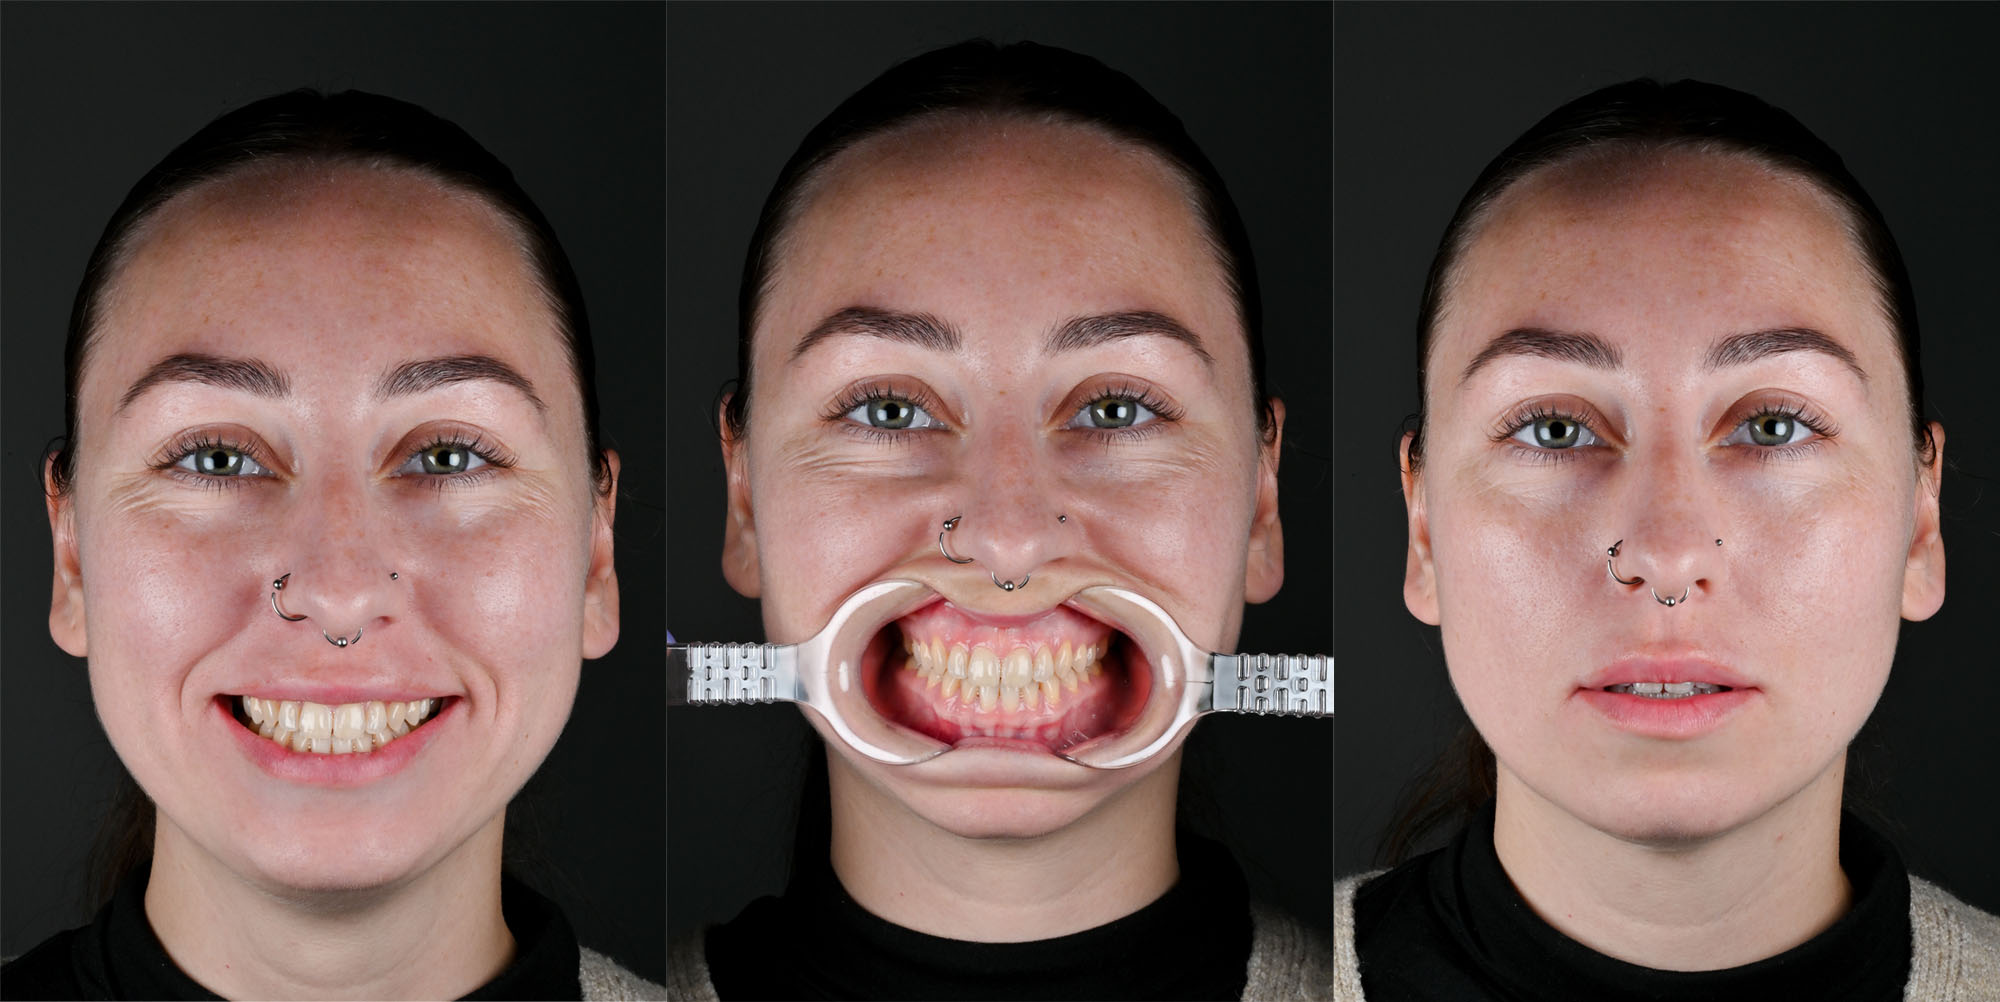
The repose photograph is essential and routinely overlooked by clinical teams. It provides critical diagnostic information that directly impacts treatment planning, particularly when determining whether a case can be managed additively with increased incisal length.
If a patient already displays approximately 4 mm of maxillary central incisors at rest, adding length is usually a poor decision and often leads to an unnatural result.
Beyond tooth length, the repose photo allows accurate measurement of upper lip length and overall facial proportions. When this image is evaluated alongside the full-smile photograph, it becomes possible to assess lip mobility, quantify central incisor display from rest to full smile, and identify whether esthetic changes should be driven by tooth position, lip dynamics, or both. In short, the repose photo anchors the entire esthetic plan in reality. Without it, treatment decisions are largely guesswork.
The Most Critical Factor: Keeping the Patient and Camera Still
One of the most important aspects of this process is maintaining a consistent position between the retracted and unretracted photographs.
When the patient removes the retractors and transitions into a natural smile, even small changes in head position can make image alignment more difficult in Exocad. Similarly, moving the camera can introduce differences in perspective, scale, and framing.
To improve consistency:
- Use a tripod: Keep the camera in a fixed position between photographs.
- Coach the patient: Explain the process beforehand and ask the patient to keep their head still while the retractors are removed.
- Maintain consistent camera positioning: Keep the camera-to-patient distance, magnification, and framing consistent.
- Check out the images: Review the photographs before importing them into the software to ensure that the relevant facial and dental landmarks can be aligned.
A simple, repeatable photographic protocol can make the digital workflow more predictable and efficient.
Lighting: An Essential Part of Clinical Photography
Proper lighting is essential for producing clear, detailed, and aesthetically pleasing dental photographs. Appropriate illumination helps reveal tooth morphology and surface texture while reducing unwanted shadows and harsh reflections.
In macro photography, diffusers can soften the light and improve illumination across the teeth. For portrait photography, controlled lighting can help create balanced images with natural-looking facial detail.
3. Digital Smile Design: From Photographs to a Digital Plan
Once the photographs have been captured, they can be imported into a digital workflow to analyze the existing smile and develop a proposed design.
Using CAD software such as exocad, the dental technician can plan tooth shapes, proportions, and contours according to the patient’s clinical requirements and aesthetic goals. The digital design provides a visual reference for the proposed outcome and can serve as the basis for manufacturing a 3D-printed mock-up.
This stage is not simply about creating an attractive digital image. The proposed design must also be evaluated in the context of the patient’s existing dentition, occlusion, available restorative space, periodontal health, and intended treatment.The final design should reflectboth aesthetic considerations and clinical feasibility.
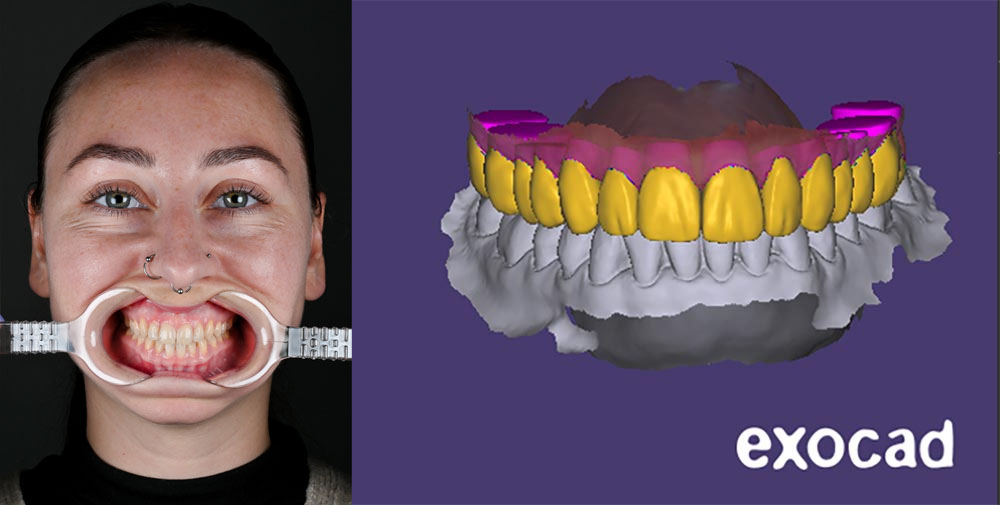
4. From Digital Design to a 3D-Printed Smile Trial
Once the proposed smile has been designed, it can be transferred into the physical world using a suitable 3D-printing workflow.
There are two main approaches to consider: the traditional mock-up using a putty key and the direct-printed mock-up.
Traditional vs Direct-Printed Mock-Ups
Once the smile has been digitally designed in software such as exocad, there are two main ways to transfer the proposed design into the patient’s mouth.
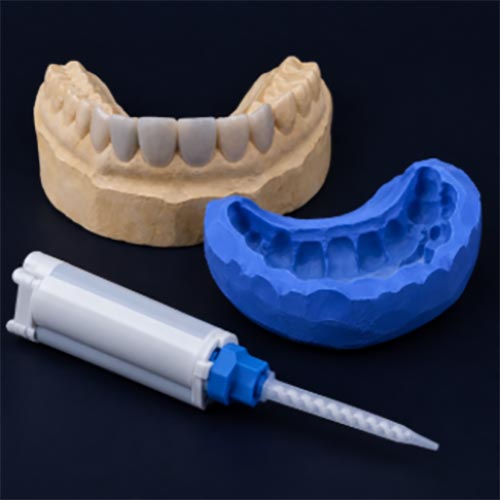
Traditional Mock-Up: Putty-Key Technique
In the conventional workflow, a physical model of the proposed smile is produced and used to fabricate a silicone putty index. The index is loaded with a tooth-coloured provisional material, such as bis-acryl resin, and placed over the patient’s teeth to transfer the planned contours. This is a versatile and well-established technique, although it requires additional fabrication steps.
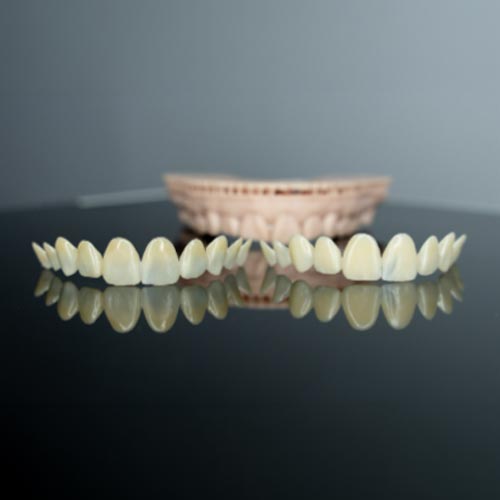
Direct-Printed Mock-Up
With a direct-printed mock-up, the proposed smile is designed digitally and printed as a thin, tooth-shaped shell, eliminating the need for a separate model and putty index. The printed mock-up can then be tried directly in the mouth, with provisional material used when appropriate to help seat and stabilize it.
In selected cases, direct-printed mock-ups may also be used as provisional restorations on the day of tooth preparation, provided the material and design are suitable for that application.
5. The Smile Trial: Evaluating the Proposed Design
The Smile Trial is where the proposed design can be assessed directly in the patient’s mouth.
It allows the clinician and patient to visualize the proposed tooth contours and consider how the design relates to the patient’s face and natural smile.
During the trial, the clinician can evaluate aspects such as:
- Tooth proportions and overall smile appearance.
- The relationship between the teeth, lips, and facial features.
- The patient’s response to the proposed design.
- Whether adjustments to the proposed contours may be appropriate.
The trial can also support communication by giving patients a more tangible understanding of the proposed treatment before definitive restorative procedures begin.
The Smile Trial should be used to inform clinical decisions and patient discussions, not as a promise that the final restorations will look or behave identically.
Conclusion: A More Visual Approach to Aesthetic Dentistry
3D-Printed Smile Design connects digital planning with clinical evaluation. By combining standardized photography, CAD software, and 3D printing, clinicians can create a more visual and interactive way to assess proposed smile changes before definitive treatment.
Traditional putty-key mock-ups remain a valuable option, while direct-printed mock-ups offer an alternative workflow that may reduce fabrication steps and provide additional applications in selected cases.
Whether you are taking your first steps in digital dentistry or refining an established aesthetic workflow, understanding the principles behind the 3D-Printed Smile Trial can help you make informed decisions about how this technology may fit into your practice.
The goal is not simply to print a smile. It is to use digital technology to support thoughtful treatment planning, meaningful patient communication, and clinically appropriate aesthetic outcomes.


